TABLE!!
By far, my longest lasting and hardest project. This project has taught me a lot about patience and woodworking in general. It required me to get tools, like a
hand plane, and to learn basic woodworking techniques.
The original design was to make a table to hold a large lizard tank. The plan slowly shifted into building a workbench and the resulting table is heavy, sturdy and awesome!
Prepare the wood
The wood was stud grade pine 2"x4" and 4"x4". Nothing fancy but I was able to get all the pieces for around $60, with some lumber to spare. The cheap wood sometimes caused issues but it was great to practice on since I made a lot of mistakes. Once the wood was bought and the design was done, it was time to rip the wood into the right sized pieces!
 |
| The wood has been bought |
| The master leaves his mark |
| The wood has been all chopped up! |
| All woodworking requires adequate supervision |
 |
| Don't cut tenons like this... |
 |
Seriously though...
|
 |
Make the Table Top
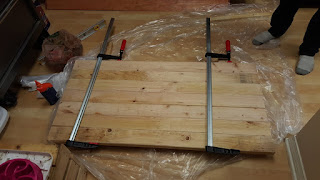
The table top was made by planing 2"x4" studs and gluing them side-by-side. I ended up having to deal with the warped boards because I glued them on the short side instead of the long side. The table would have been too heavy if I had done this, so I think 2"x2" would be better next time. Or maybe I could buy nicer wood. ;)
| The table top is ready!!!! AAAAAAAHHHHHHHHHHH!!!!!!!! |
I made the mistake of cutting one mortis hole out of the table top before making the apron. It wasn't a dealbreaker but it meant that I was now committed to the placement of my apron and I couldn't adjust anything to account for mistakes. It still worked, but next time I would do all 4 mortises at the same time.
Make the Apron
I watched this
Paul Sellers video on how to make a mortis and tenon with a hammer and chisel. Mistakes were made but it all looks pretty good and it is super sturdy! I was saved by making my own wood filler from sawdust, ask Home Depot for it by the bag load, and wood glue. It isn't perfect but it can bridge a large gap between a mortis and tenon while still being as strong as wood.
 |
| 2/8 mortises complete! |
 |
| Oops! I broke the top of a mortis but wood filler made it all better! |
 |
| The apron was dry fitted and is ready to be glued! |
 |
Apron is all glued!
|
| IT'S A TABLE! Still work to be done, but it is now a table. |
Finishing Touches
The table as a whole is sturdy and a single piece, but the legs are uneven because I didn't think to square off the bottoms and make sure they are all the same length. PATIENCE! Still working on that part and planing the table top. I also will add a shelf to hold the tools below the table, just a sheet of plywood on top of two horizontal beams on the short end of the table. Maybe also a chamfer or rounded edges for the whole table?
The next step will be a stain of some kind, maybe Danish Oil. I need something that won't chip or crack but can protect the wood from the damage I will be putting it through.
I will then be able to modify the table as needed. I plan to add a vice to make cutting easier and maybe even a roller thing to hold dropcloths, butcher paper and other things I will drape over the table.
Final Thoughts
What an amazing project! Thank you to my buddy Weecho for all the teaching, advice and patience he had while getting me started. The table design was his, as well as the tools used in the beginning of the project while I was still buying them. I learned most of all to be patient. Squeezing in an hour of rushed work before I go out somewhere will usually cost me even more time later fixing that mistake. I also dug out the table top mortises with a drill at first and the bit was WAY too big. This caused some cracks on the table top. :( I wasn't getting anywhere with the chisel because of how hard the lumber was.
I learned about some different joints and the tools used to make them. I like the chisel made tenon/mortis system, easy to make and super sturdy. Just not the prettiest for a table top when you might not get the fit just perfect. I learned how to take the time to sharpen a chisel for ultimate performance. I also learned how to
restore an old hand plane and use it for smoothing out surfaces.
Overall, I'm proud of what I've built and I plan to keep this table around for years while always modifying it in some form or fashion.


No comments:
Post a Comment